1. Create the workflow.
There are several workflow types in Hubspot, but we will use contact-based workflow centered on date, because this workflow type seems to be the most suitable for webinars and other events.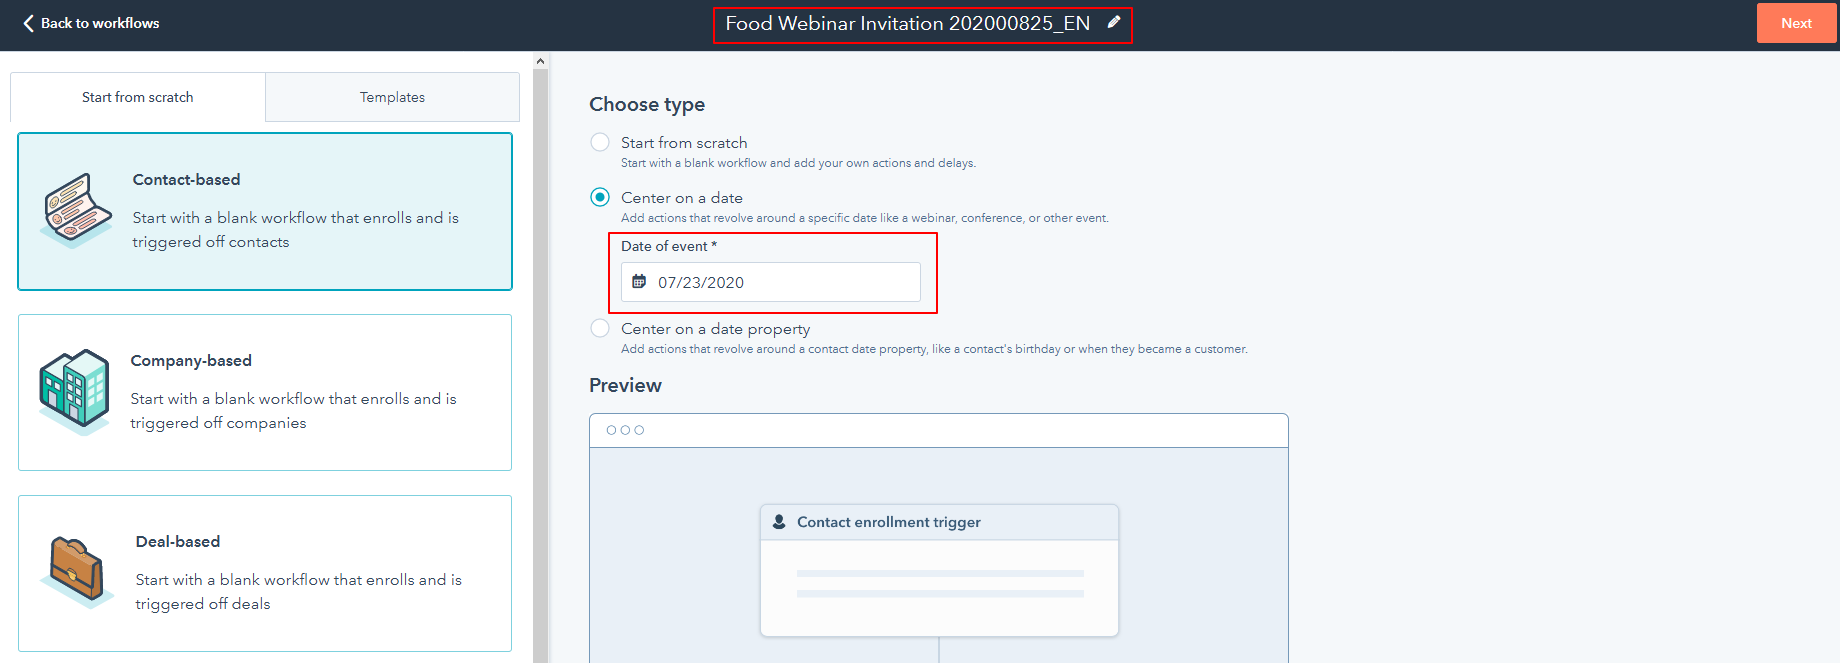
Set the date in date field, when the workflow action has to be occurred (i.e. date when the email has to be sent out).
Give the name to your workflow (I used the same name as invitation email has, but you may use any name you prefer).
Click Next button in top right corner.
Congratulations! Workflow is created.
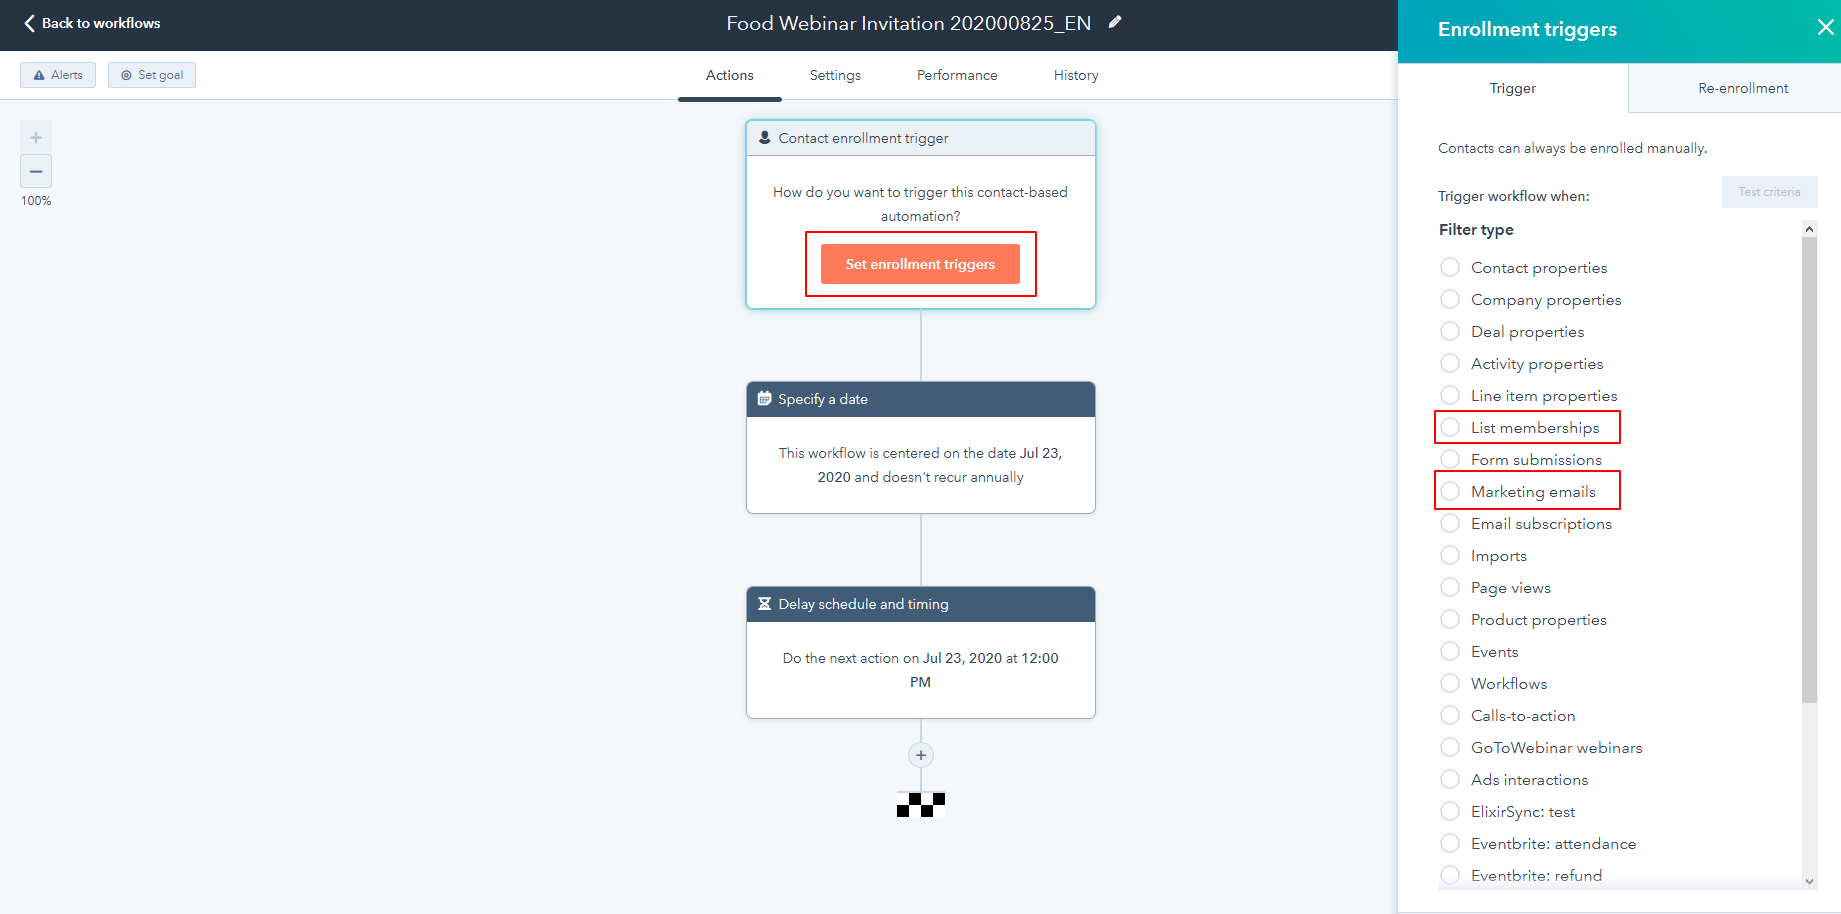
2. Set enrollment triggers.
There many different enrollment triggers in Hubspot, but we are interested only in two: "List Membership" and "Marketing Emails".
2.1 This is the first sending
If no such invitations has been sent to your contacts yet, you may arrange the first sending to list of your contacts.
Assuming that you have the list of contacts and the email itself, set the enrollment trigger and choose "List membership". Find the list of your contacts and choose it.
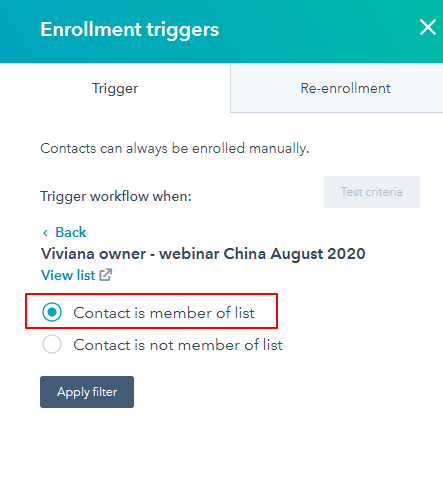 Apply "Contact is member of list" filter, then save the trigger.
2.2 This is not the first sending
If your email has been already sent out, and you wish to arrange following sendings, use "Marketing Emails" option to set enrollment triggers.
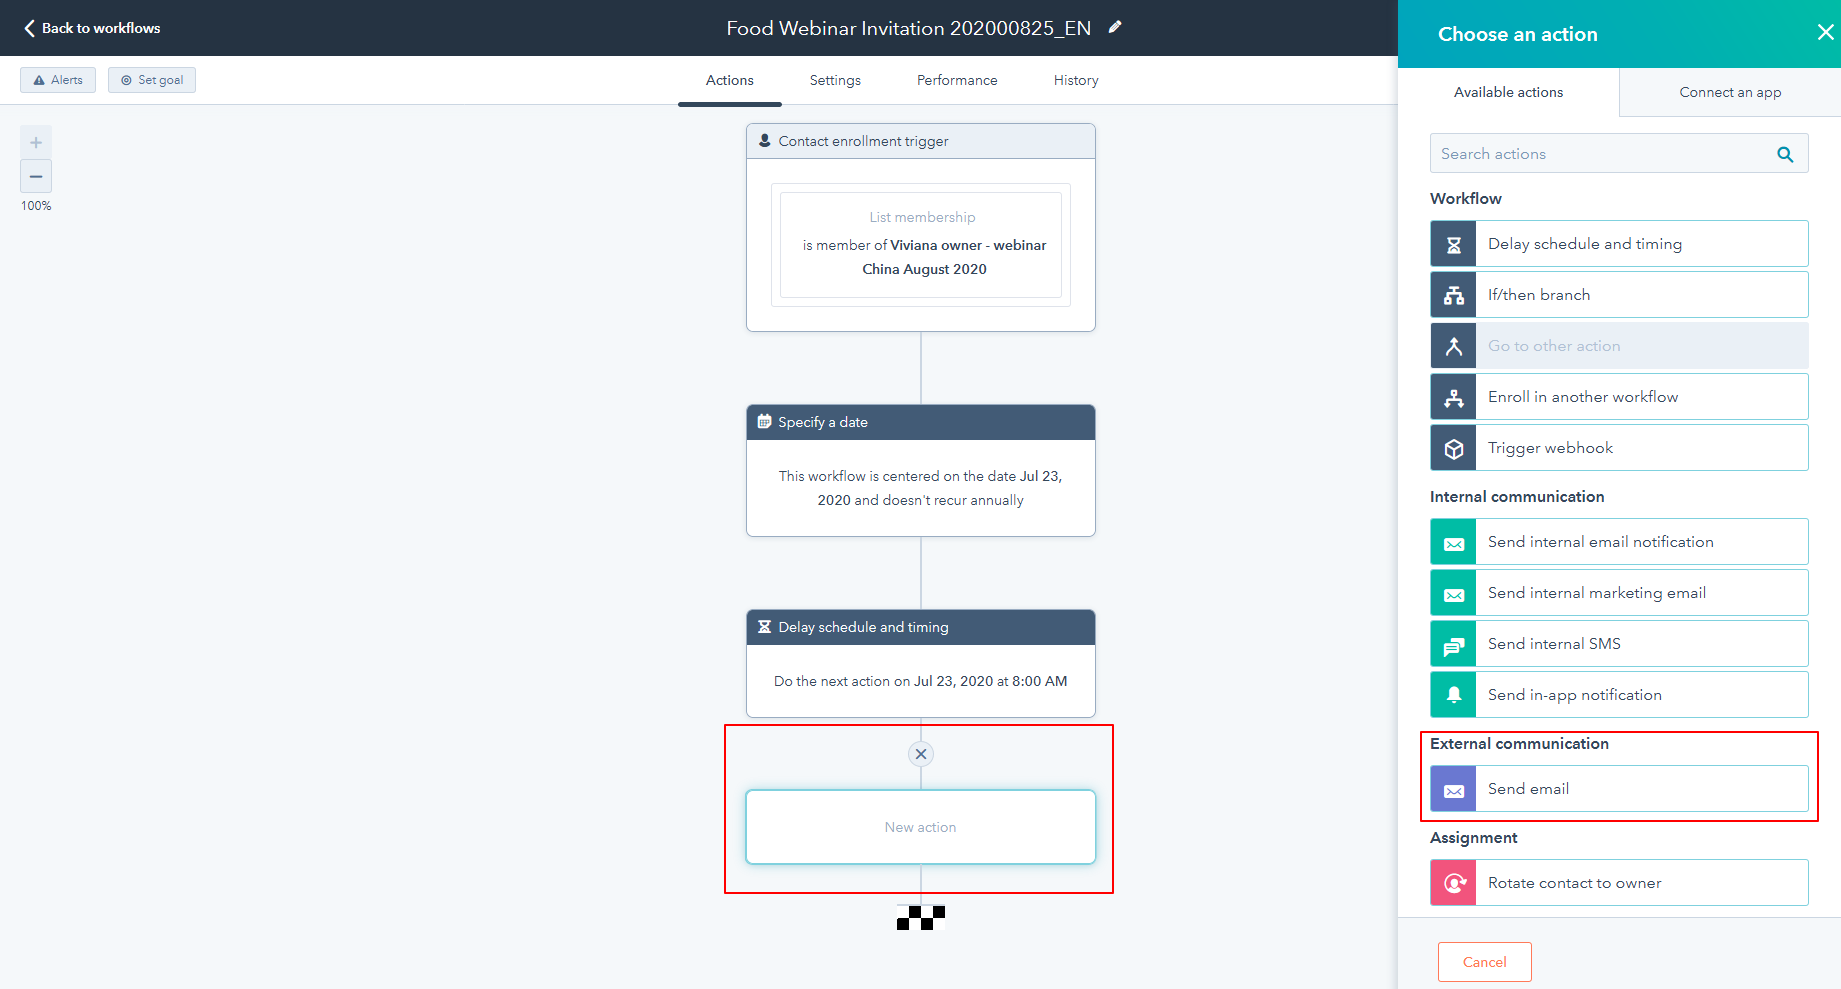
3. Set the action.
Next step is to set the action for chosen date.
Set new action by clicking "+" at the workflow end. In our case the action will be "Send email" under "External communication".
To make it possible to use particular email in workflow it has to be saved for automation. Open the email, go to Recipients tab and you will see this option.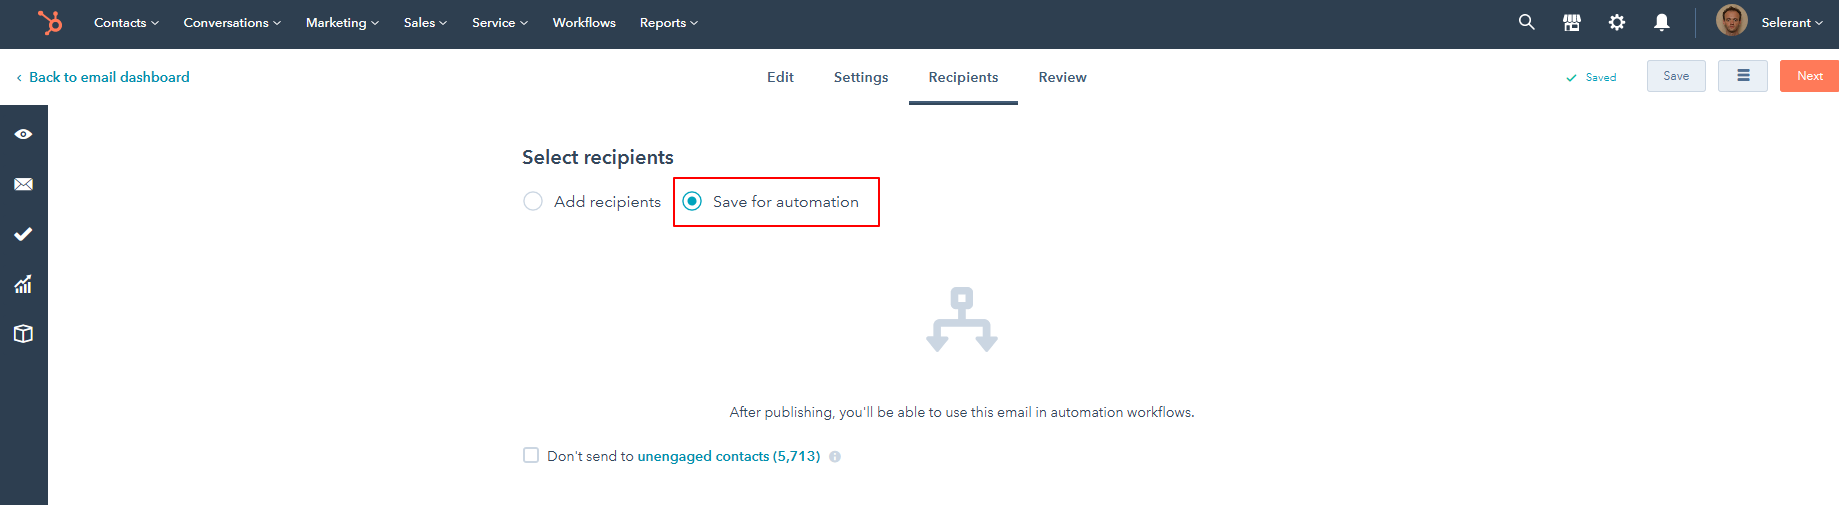
Save your email for automation if it hasn't been done yet, and go back to your workflow. While setting the action, select your automated email and save the choice.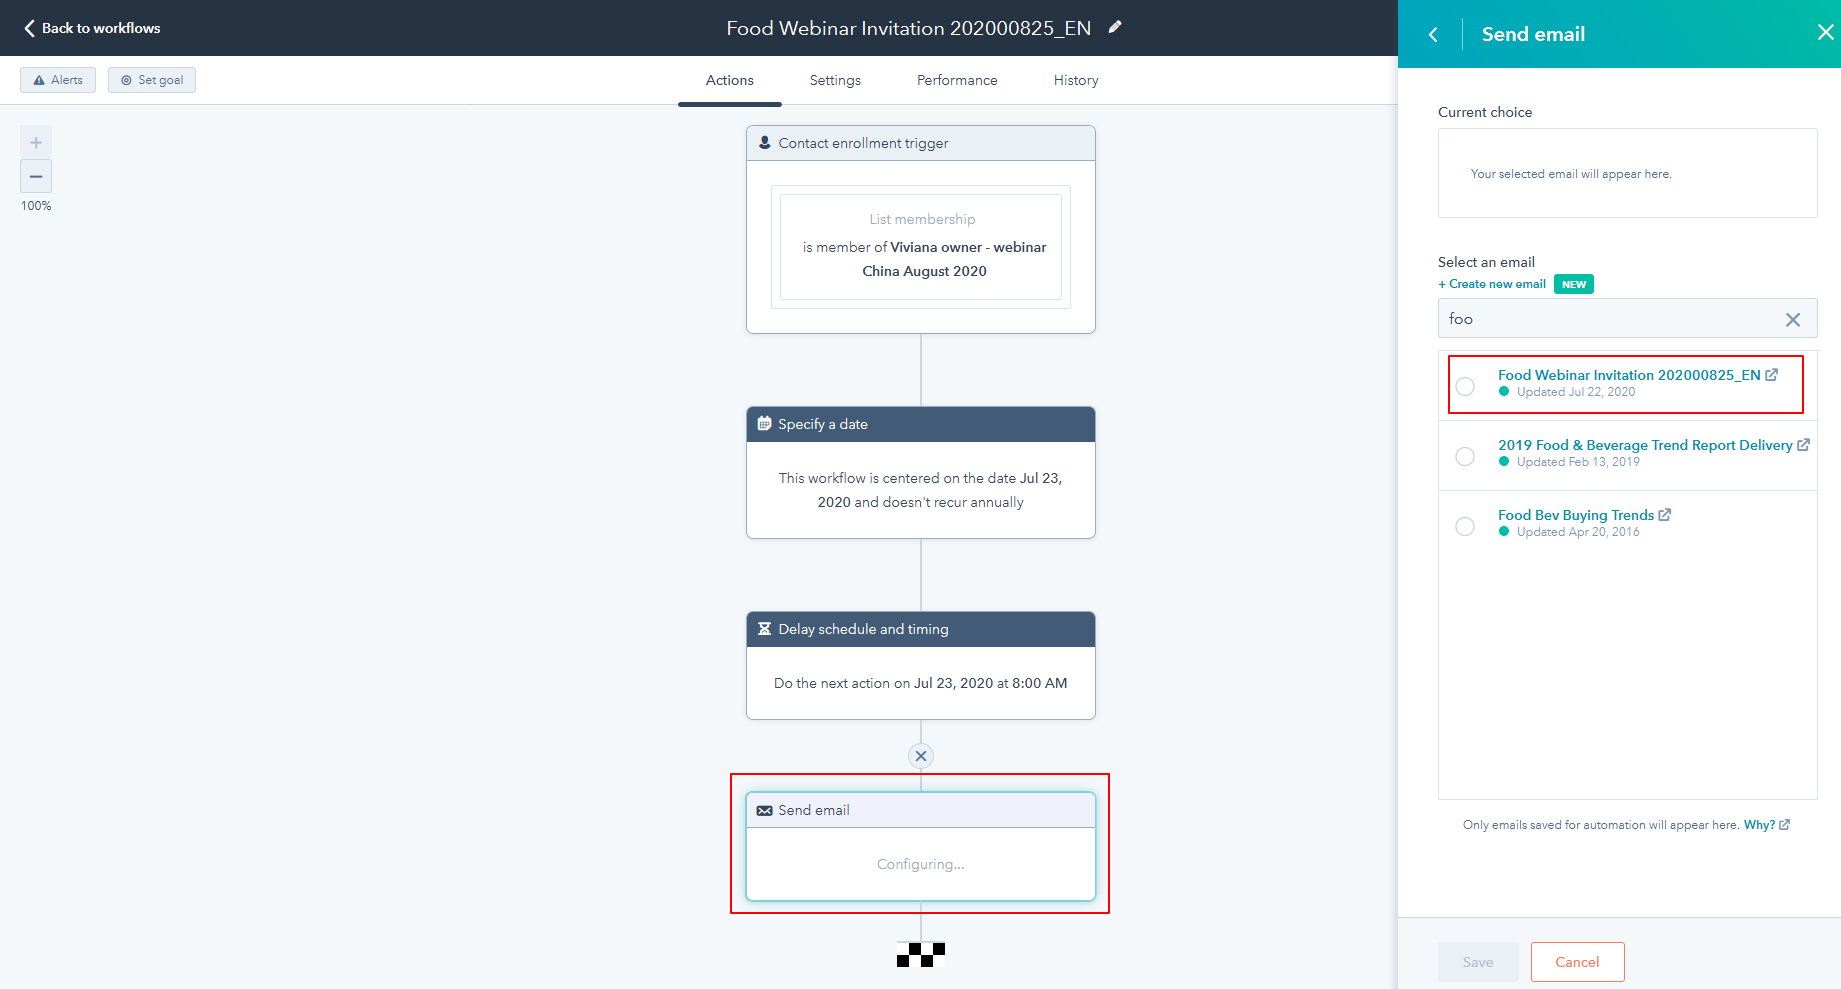
4. Add delay and recurring sending action
4.1 Add the Delay
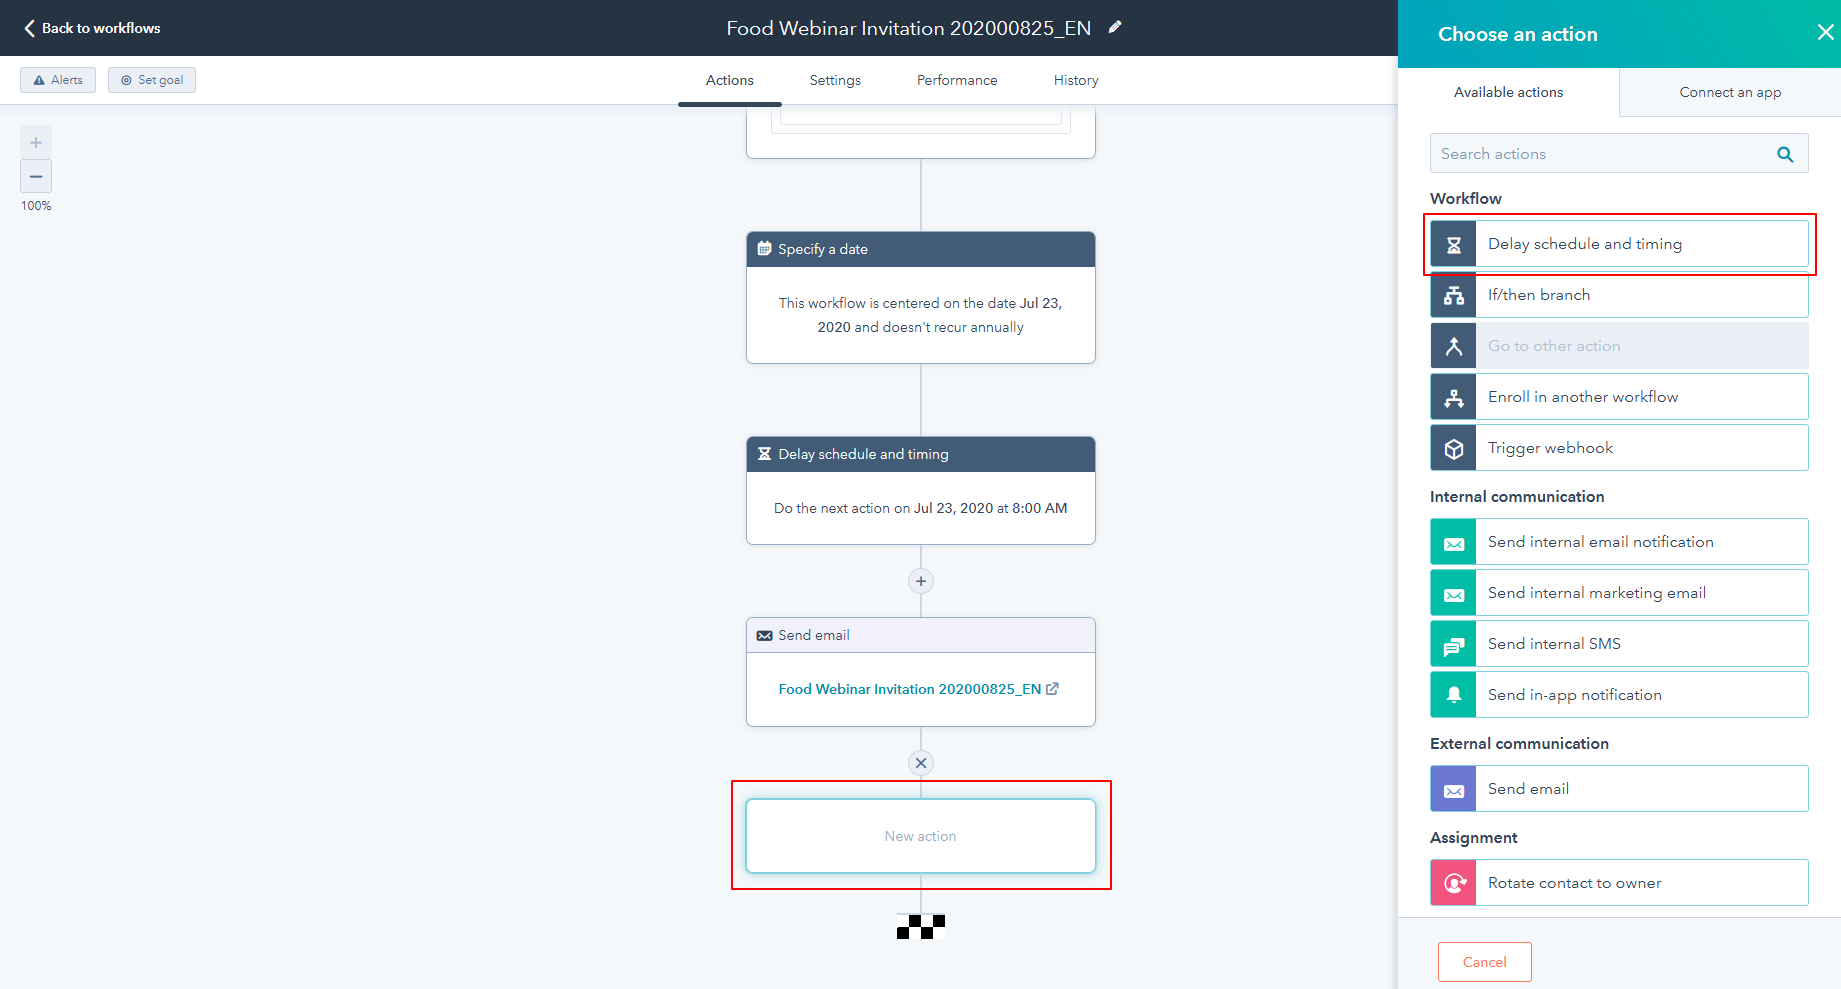
Set new action by clicking "+" at the workflow end.
Choose "Delay schedule and timing" option from list.
Set the day and time when the next action has to be occurred.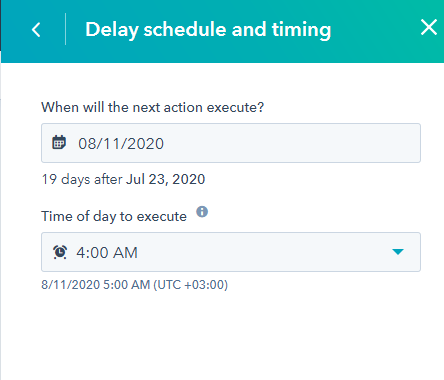
Save the action block.
4.2 Add If/Then Branch
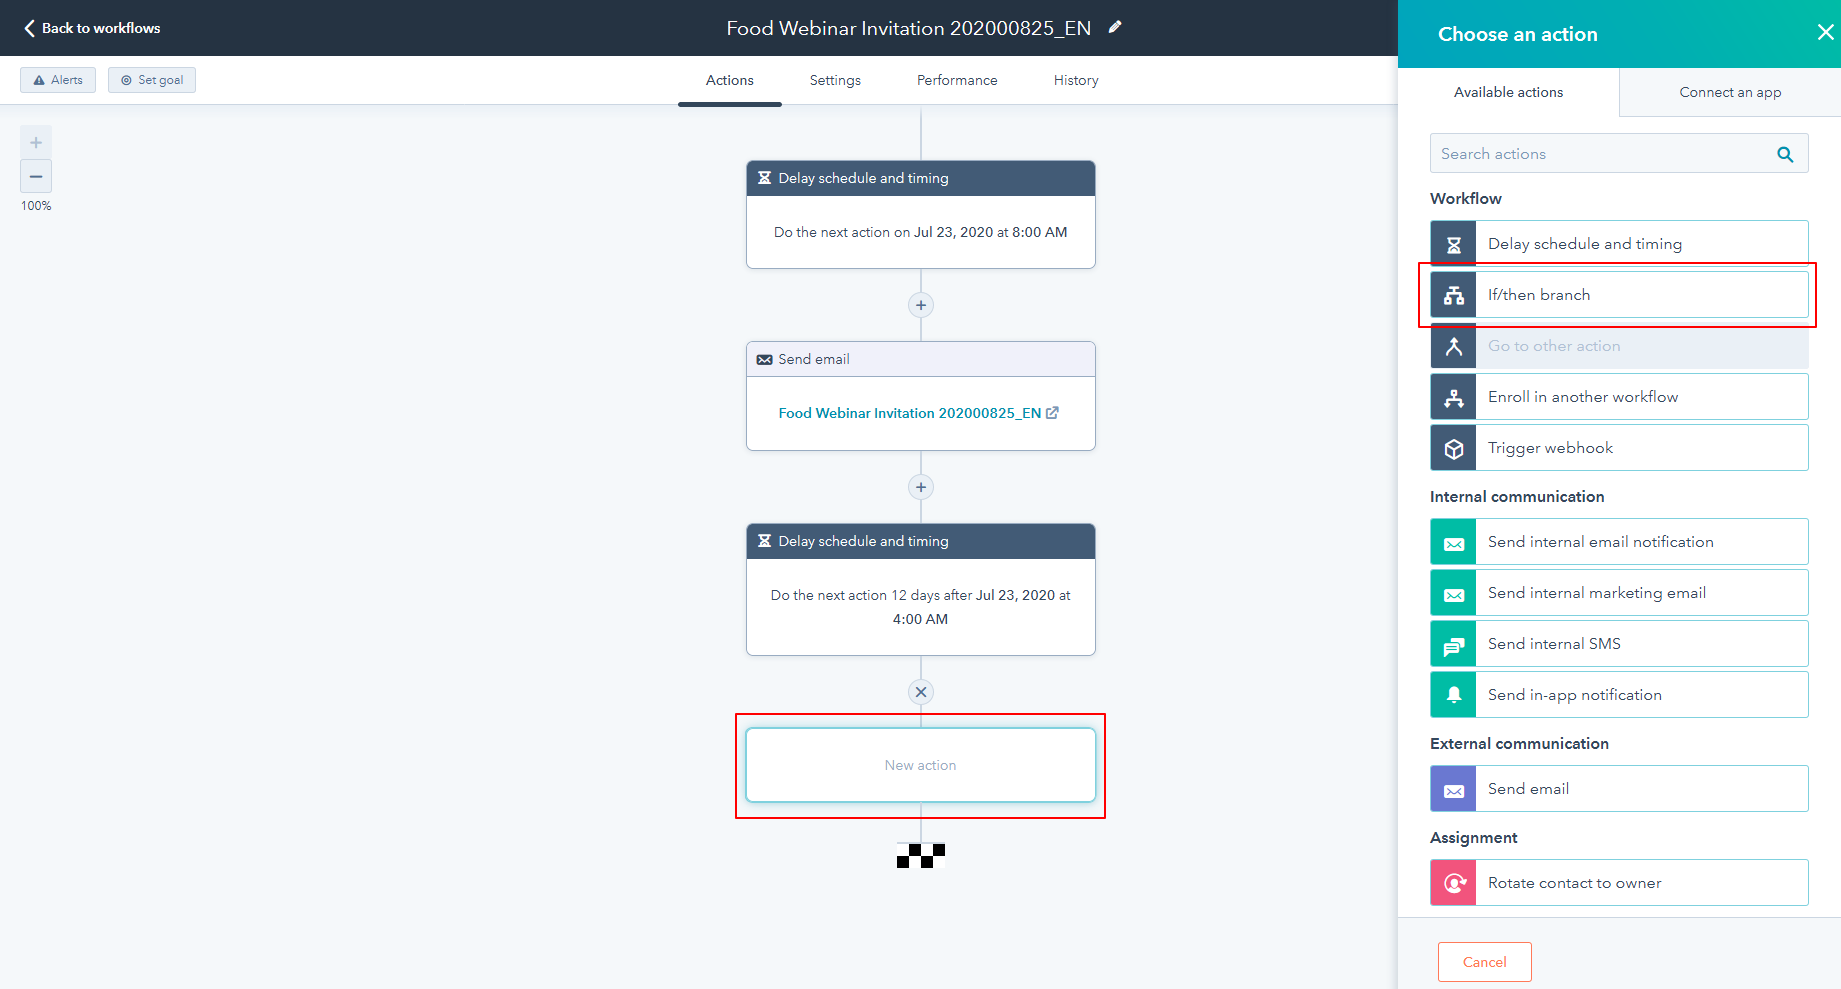
Set new action by clicking "+" at the workflow end.
Choose "If/then branch" option from list.
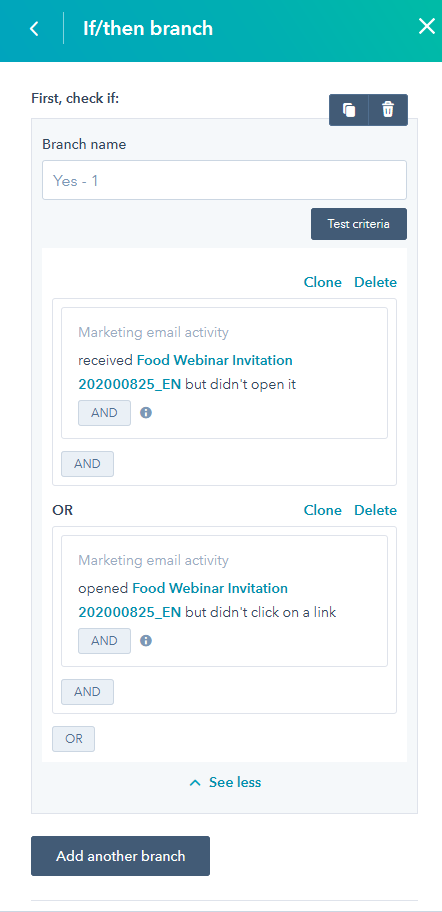
Apply filter "Marketing Emails" and find your email.
Apply following filters:
- received the email but didn't open it
OR
- opened the email but didn't click on a link
 Add new action to the "YES - 1" branch by clicking "+".
Arrange the next sending by choosing "Send Email" option under "External communication".
5. Review the workflow and turn it on.
When enabling the workflow, choose the option "Yes, enroll existing contacts who meet the trigger criteria as of now".